First boot
Download ISO file
- First of all you need to choose the latest ISO file. You do this by opening the Global mirror of Arch Linux. Arch releases a new ISO every month, so if you want to have a rescue drive ready for the worst-case, be sure to keep it updated.
Tip: If you want, you can choose another mirror from this link.
- Choose
archlinux-x86_64.isoand download it to a folder where you can access it easily.
Flash the ISO file
To be able to boot into the Arch ISO, we first have to flash it onto an external flash drive, like an USB stick. There are special programs designed to help you copy the contents of the ISO in a machine-readable format onto the stick. You can use Balena Etcher for this.
- Download Balena Echer from their official website. You have to choose the appropriate package for your system.
Tip: If you're already on Arch Linux, and want to use Balena Etcher for other purposes, you can install it from the AUR (etcher-bin)
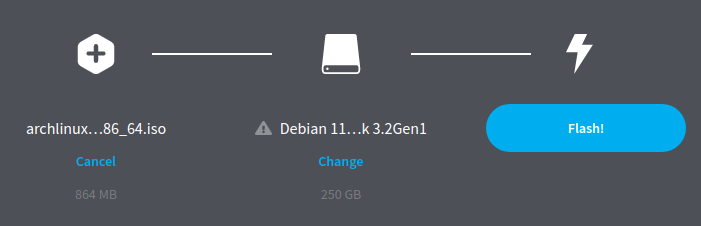
- Once you open the program, you'll be greeted with three options. Select your freshly downloaded Arch ISO, then on the second your flash drive, and finally flash! This process might take some time, depending on your transfer speeds, so go ahead and make some popcorn!
Warning! This will format your drive, which means that all data will be deleted! Proceed with caution!
- You're done! We can now proceed with installing Arch.

Booting into Arch
- We now have to boot into Arch Linux. You can do that by rebooting and entering your BIOS.
Note: Your hotkey for entering the BIOS depends on your OEM, so try googling for that first. Most of the time, it's either Esc, Delete, F1, F2, F10, F11, or F12.
- Here, we need to enable USB Booting, if you haven't done so already. Once that's done, press F10 to save and exit the BIOS.
- Enter your BIOS screen again, this time going to your Boot Override section. If you do not have that, or cannot find it, try reordering your Boot Order to prioritise USB-Drives temporarily. Choose your Arch Stick and boot into it.
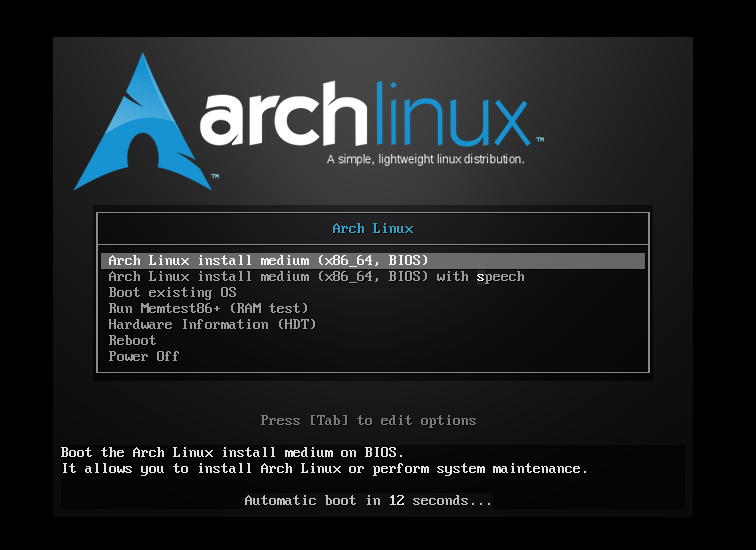
- You're going to be presented with Arch's GRUB menu. Just press enter or wait until it boots by itself.

- Once the boot process is complete, you'll be presented with a nice looking shell like this:
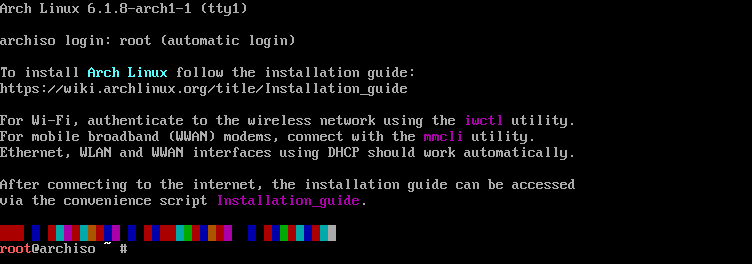 This is the screen you will spend a lot of time of the installation in.
Now you can continue installing Arch.

